Browsing Category

Cakes and bakes

Lemon Cake

In the absence of any real sunny, warmth, I’ve brought you a recipe that uses an ingredient that always reminds me of summer. But rather than the lemon being in a long, cool drink, this time it’s in a light, fluffy sponge cake.

Ingredients
140g plain flour
140g golden caster sugar
1 ½ teaspoons of baking powder
40g unsalted butter
1 ½ tablespoon of honey
juice and zest of one lemon, set aside some zest for the topping
110ml whole milk
1 medium egg

For the topping
4oz icing sugar
3 tablespoons of water

Grease and line a 20cm cake tin and preheat the oven to 150C.

I use a food processor for this, but you can equally make this by hand. Place all of the ingredients except the milk into a bowl minus. Mix until all of the ingredients are well combined and the mix becomes a little firm.

Slowly add the milk until well mixed. Pour into your tin and bake for about 20 minutes or until light golden brown.

While the cake is cooling, mix the icing sugar with one tablespoon of water and stir well. You’re looking for icing that will hold itself on top of the cake. If the icing is tough and won’t likely spread, add a further tablespoon of water.

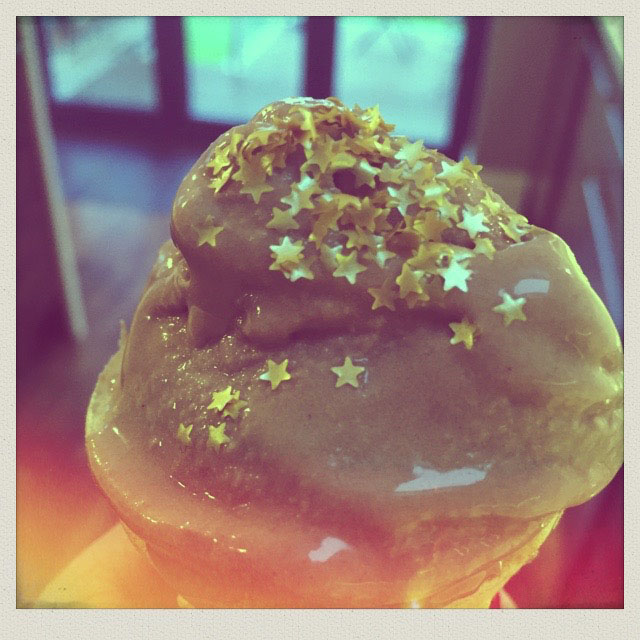
Pour the icing on the cake, allow to set and then add a sprinkle of the leftover lemon zest.

Candy floss cakes

Take a basic sponge mix, add a little icing, a string of candy floss and a sprinkle of sparkle and you’ve got a little something to brighten up those winter days.

Ingredients
6oz unsalted butter softened
6oz golden caster sugar
3 medium eggs
6oz self raising flour
teaspoon of vanilla extract
tablespoon of milk

for the decoration
4oz of icing sugar
water
food colouring
candy floss- I used sweetzone 20g tub
edible silver glitter spray

Preheat the oven to 160C and line a baking tray with different coloured bun cases

I prefer an all in one method for sponges, add the butter, sugar, flour and eggs in the food processor along with the vanilla extract, mix until well combined, if the mixture becomes too firm add a tablespoon of milk.

Divide your mixture between the bun cakes and bake for about 15-20 minutes.

For your icing, plan whether you are going to have just one colour or a few and then divide your icing sugar into separate bowls accordingly, the 4oz in the ingredients should be enough to cover all of the cakes. To make your icing, sift your icing sugar, add a drop of your food colouring and add water a teaspoon at a time until you have the right consistency, for these cakes I wanted it to be quite thick.

When the cakes have cooled, spread the icing and allow to set, top off with a pinch of candyfloss. Top off with a light spray of edible silver glitter spray.

The candy floss on the cakes will start to dissolve back into sugar after a few hours, so if you’re trying to make ahead it’s best to add the candy floss just before serving.

Tie-Dye Cake

Heart Cake

This cake takes a basic sponge recipe and gives it a bit of a glam makeover. I used pink colouring with the plain mixture for this, but you could add a couple more for a rainbow effect;, use browns and greens for a camo’ effect or even black, brown and plain for an animal print effect.

Ingredients

  • 6oz self raising gluten free flour
  • 1 tsp xanthan gum
  • 6oz golden caster sugar
  • 6oz room temperature butter
  • 3 large eggs
  • ½ tsp vanilla extra
  • Decorations, I used plain icing with an edible glitter spray.
    Cookie cutters

Pre heat the oven to 160c and line your baking tin, this mixture is enough for two 8inch sandwich tins or a single larger tin.

I prefer the all in one method, so put all the ingredients into a food processor and mix until you have a well-combined, creamy mixture.

Pour into your baking tin/s and bake for about 20 minutes until the edge just starts to come away from the tin and the middle is soft and springy.

Allow to cook then using your cookie cutters gently cut out the shapes.

Tie-dye Cake

I didn’t want too much decoration on my cakes because I wanted the tie dye effect to be seen. So I went for a simple icing sugar and water mixture, I’d like to give instructions but when I make icing it starts off with a little icing sugar then I add too much water then I have to add more icing sugar, then it’s too gloopy so I add more water then I run out of icing sugar, have tons of icing and only use a fraction. Once the icing had set I used a light spray of edible silver spray.

Chocolate Ice Cream

Chocolate Ice Cream

So the minute I decided to make ice cream I scared the sun away, sorry about that. But in the meantime here is a chocolate ice cream recipe that should bring back some sunny memories. I use raw cacao powder in this recipe because it gives a really rich, chocolatey flavour. When it comes to chocolate I thoroughly believe that more is more, so feel to add some chocolate chips to this mixture when you transfer it to the ice cream maker. And for even more indulgence I make this recipe using double cream, which makes for an even creamier taste.

Ingredients

  • 500ml full fat milk
  • 175ml double cream
  • 1 Vanilla pod
  • 150g golden caster sugar
  • 3 egg yolks
  • 2 tbsp raw cacao powder

In a pan combine the milk and cream, scrape out the vanilla pod and add both the pod and seeds to the pan. Heat gently to just before it starts to boil, then set aside to cool. In a separate bowl, mix together the egg yolks and the sugar.

When the milk and cream mixture is cool enough not to scramble the eggs but warm enough to dissolve the sugar, remove the vanilla pod and gently add the egg mix, stirring as you add.

When all the sugar has dissolved add the raw cacao powder, I like to whisk this in as I feel it gives an airier texture.

Return the mix to the hob and gently heat through stirring continuously. You’re looking for a mixture that coats the back of a spoon, when you’ve achieved this, set aside and allow to cool completely.

When cooled, pour into the ice cream maker for between 40 and 60 minutes.

If too much dairy isn’t your thing, you can substitute the double cream for full fat coconut milk.