Autumn Days- Halloween

I love this time of year, the frosty mornings, dark, cosy nights and the colours. And there are so many excuses to celebrate, so with that in mind I’ll be tuning in to all things autumnal in the coming weeks. Where better to start- Halloween.

These last few years Halloween has really been ramped up, the costumes, parties and decorations are just getting bigger and better. So while I’ve been out and about I’ve been snapping the best Halloween treats and trying to learn a few tricks.

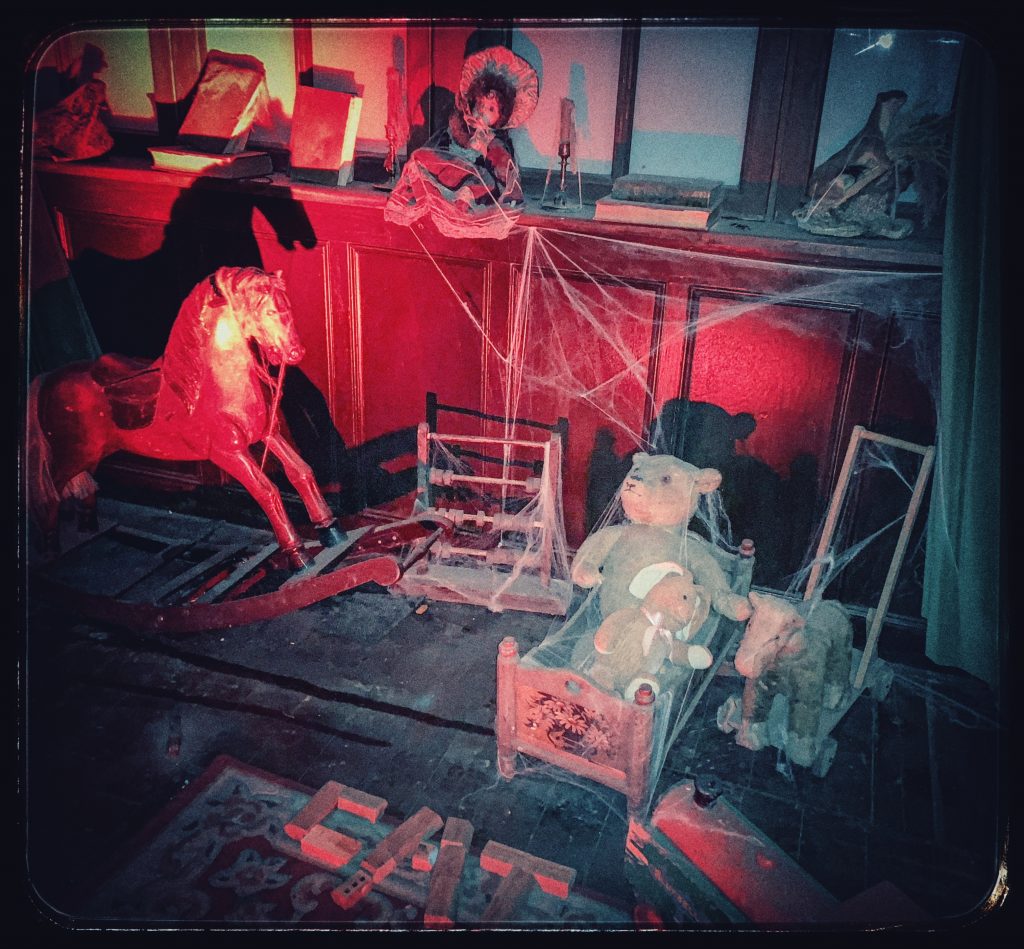
One light bulb moment came when I saw this display of old, kids wooden toys. Cobwebs, dust and careful lighting make this scene look like it’s straight out of a horror film- you’re just waiting for the rocking horse to start moving. This would be perfect for a house party.

The hosts of this soiree look all nice and friendly but I don’t fancy what they’re serving up, boiled brain anyone?


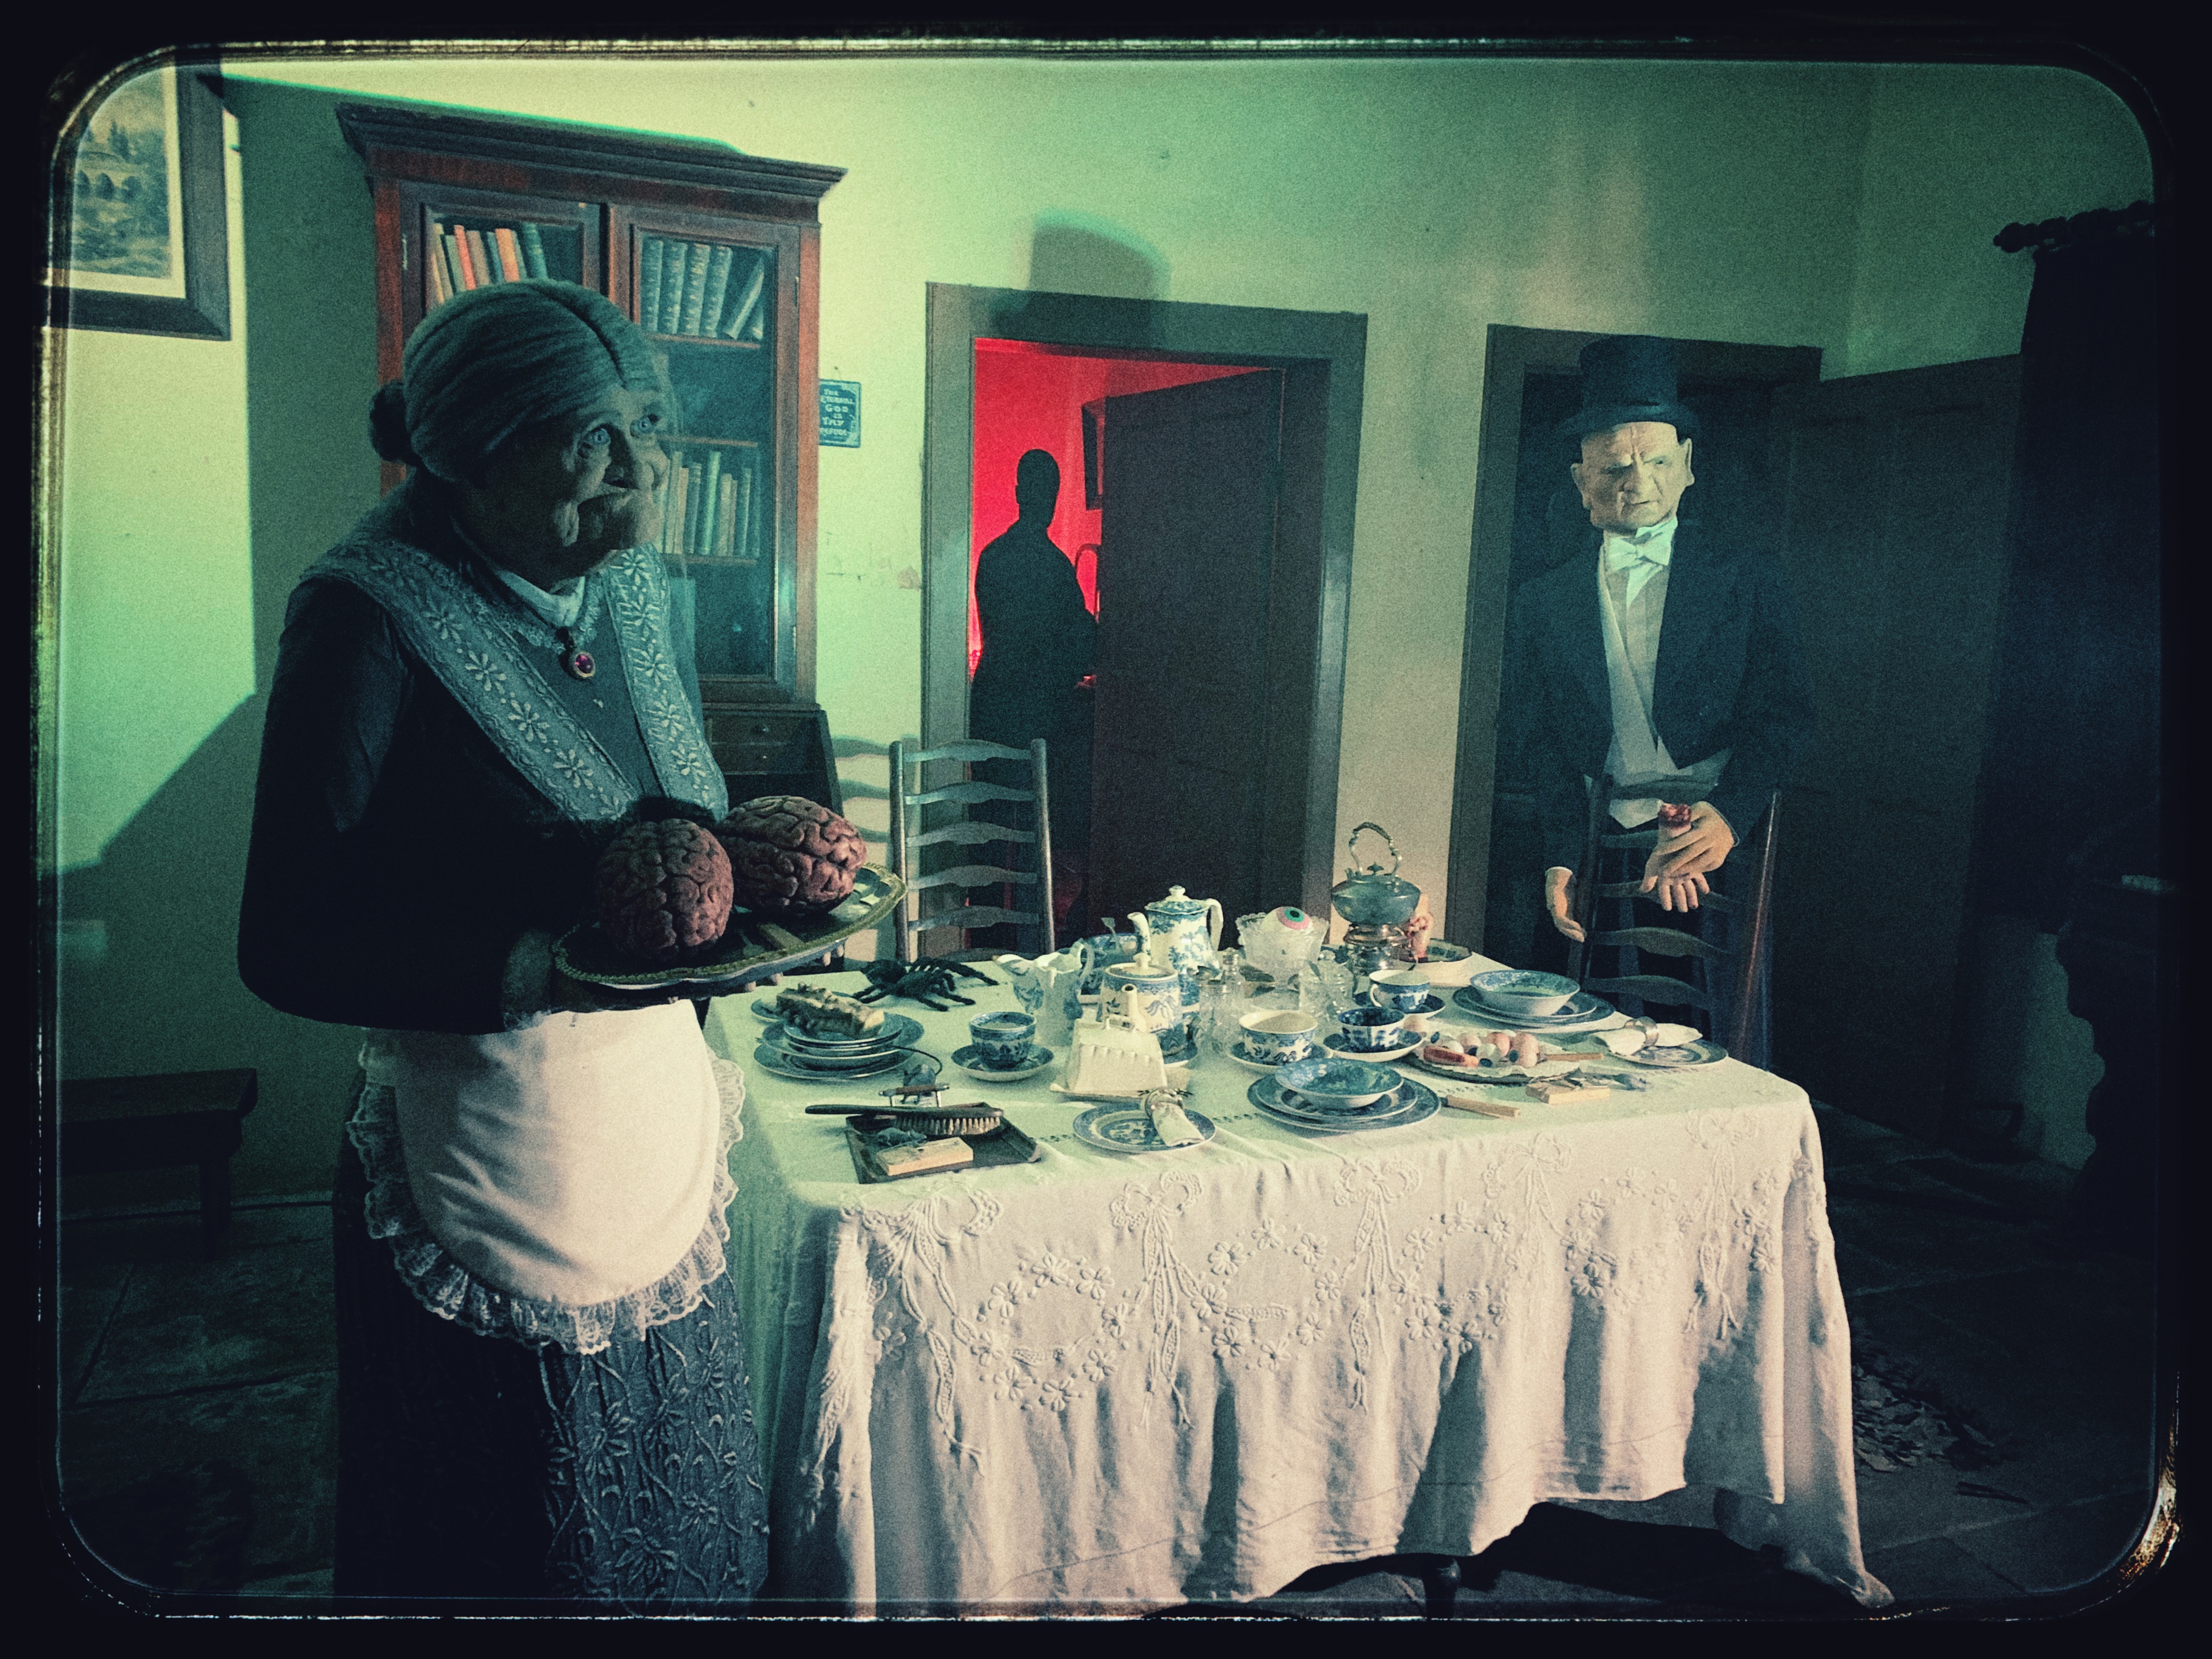
The spooky cut out at the back is one idea I’m going to do, I thought of sticking one in the window.

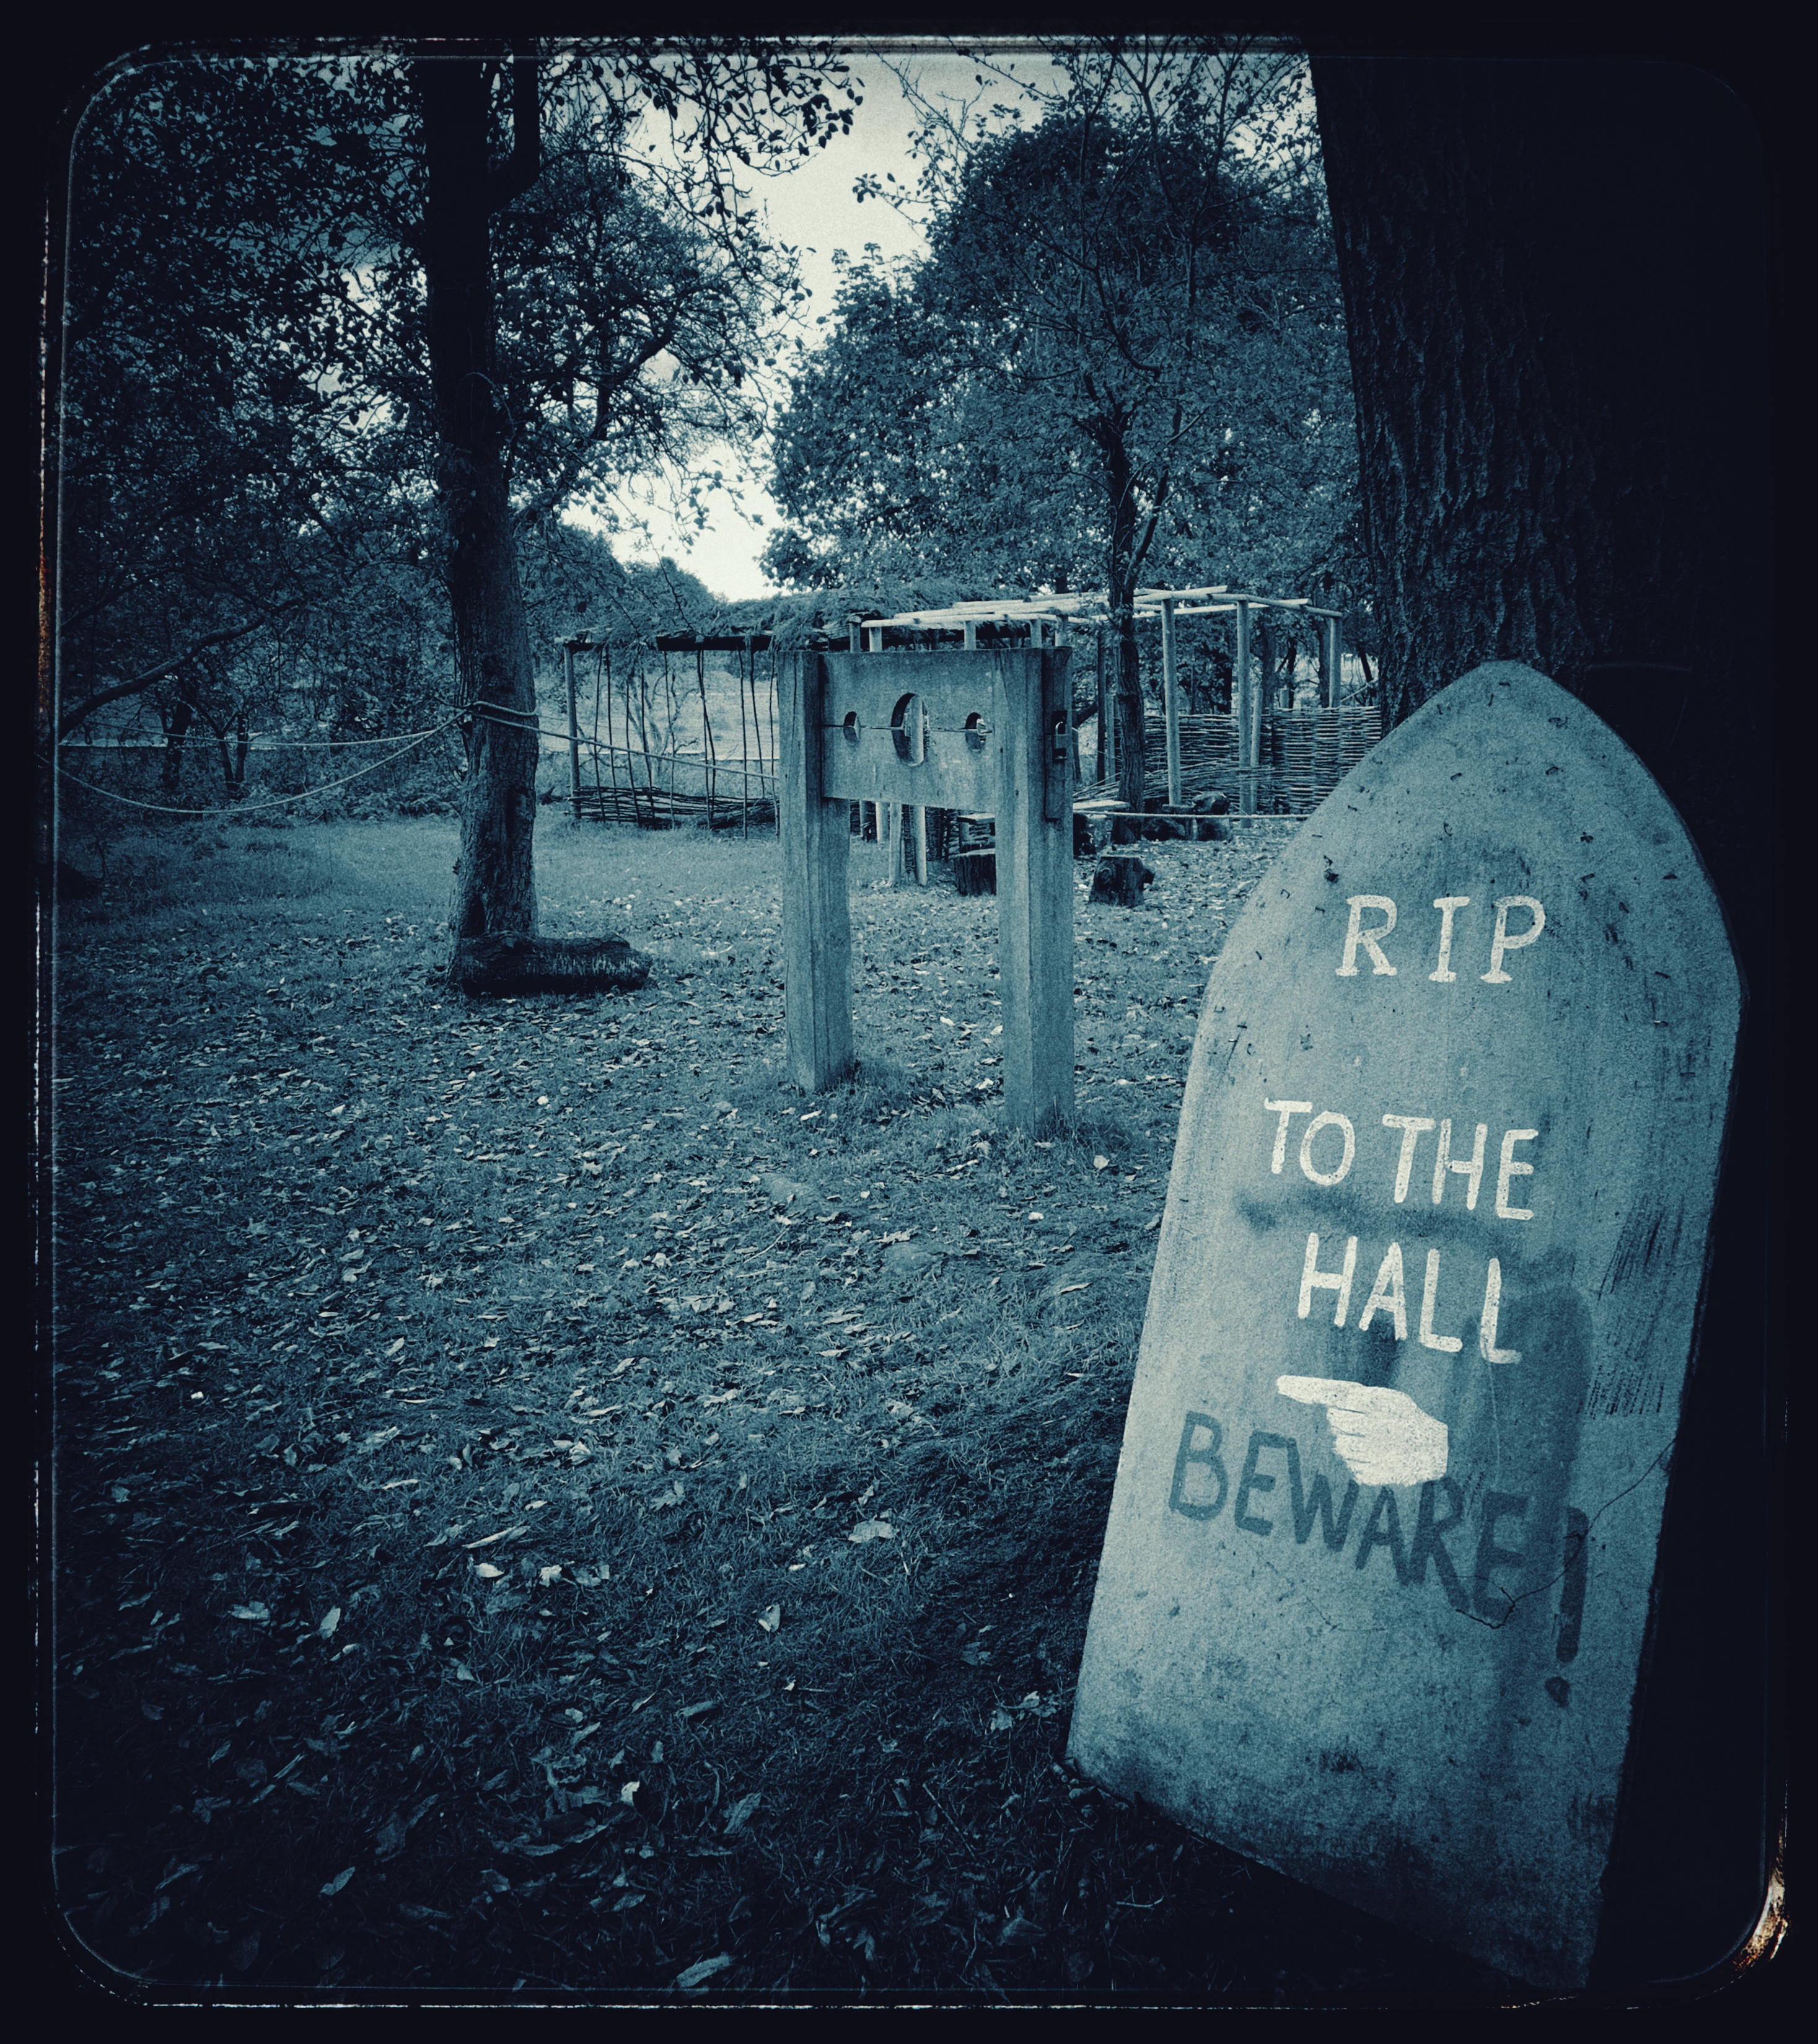
It wouldn’t be Halloween without a decorative grave stone, I like the idea of using it for directions like this one.

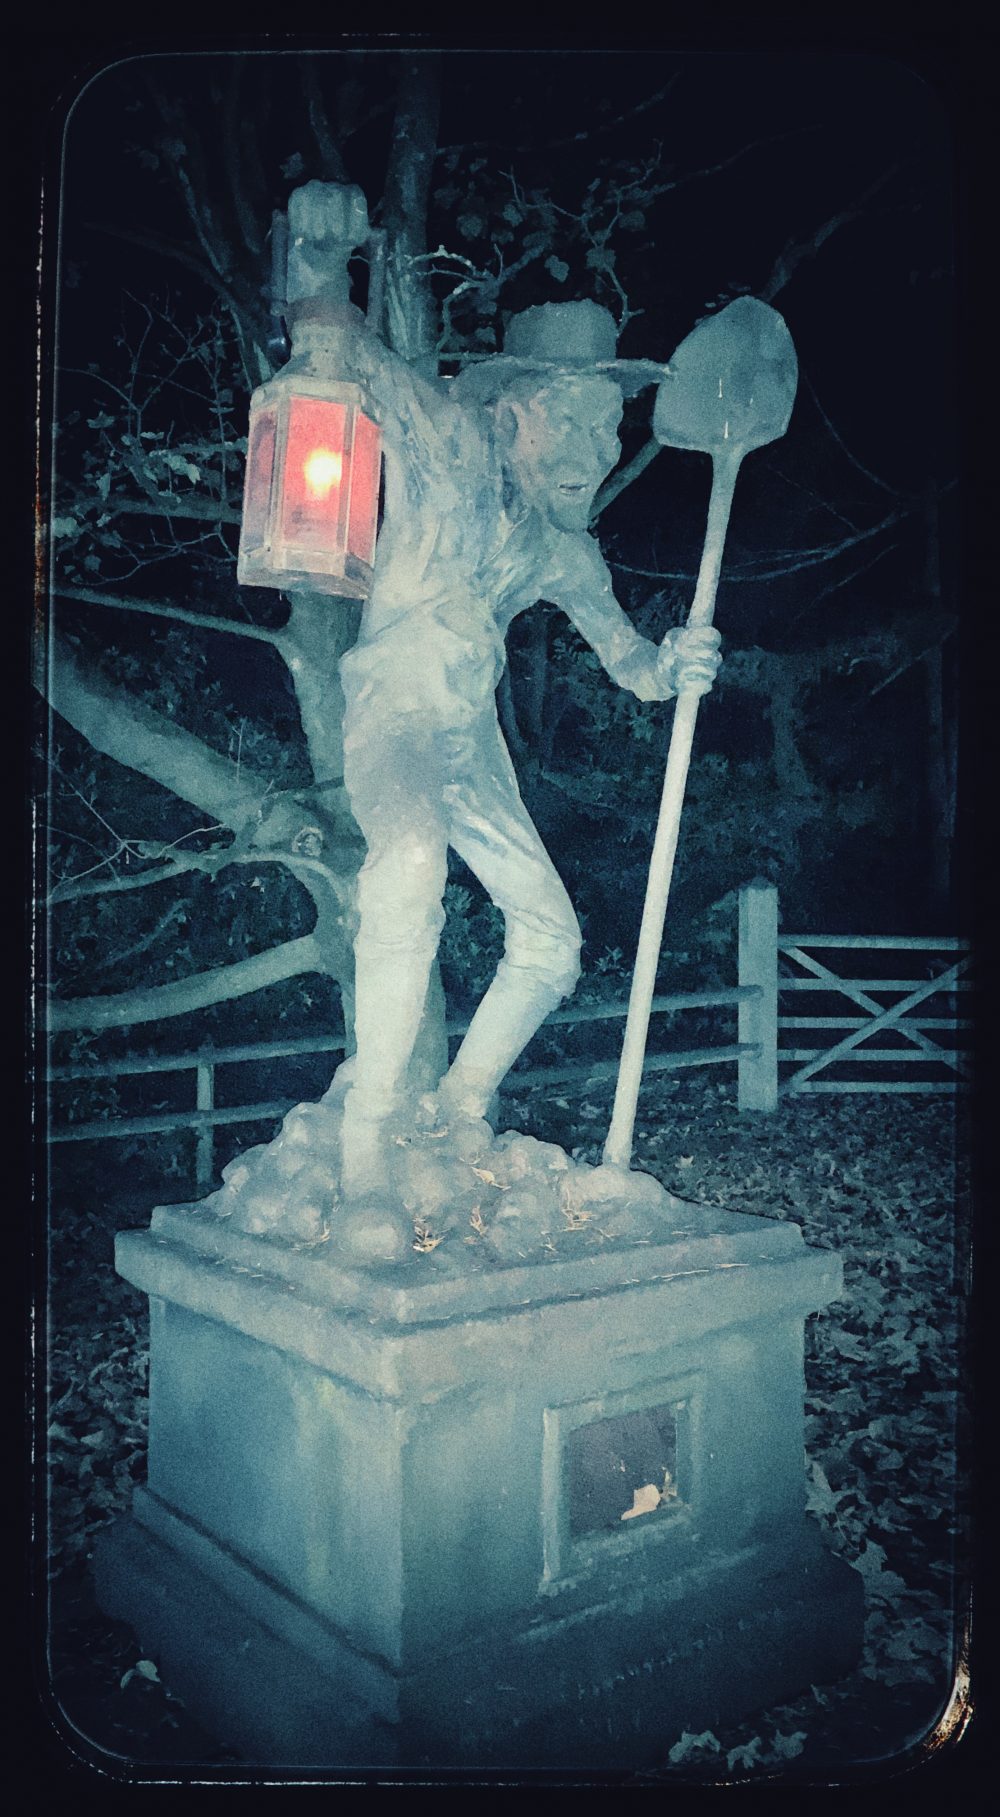
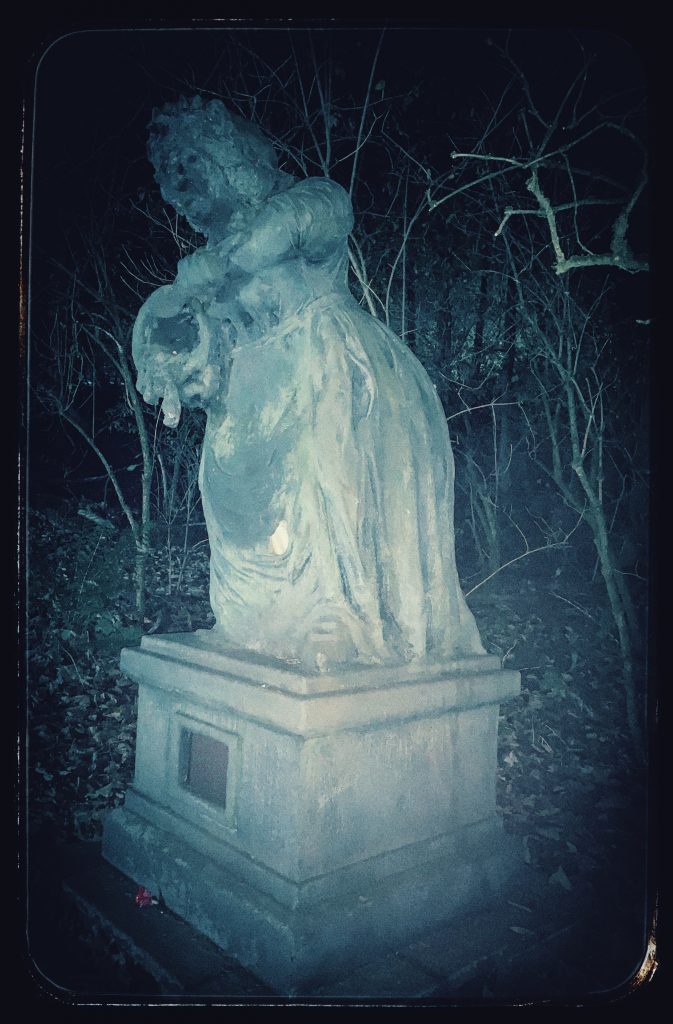
These statues remind me of those mime street performers. Admittedly these kind of props could be a stretch, but an old mossy garden ornament with solar lights and a good dose of autumn leaves would be just as ethereal.

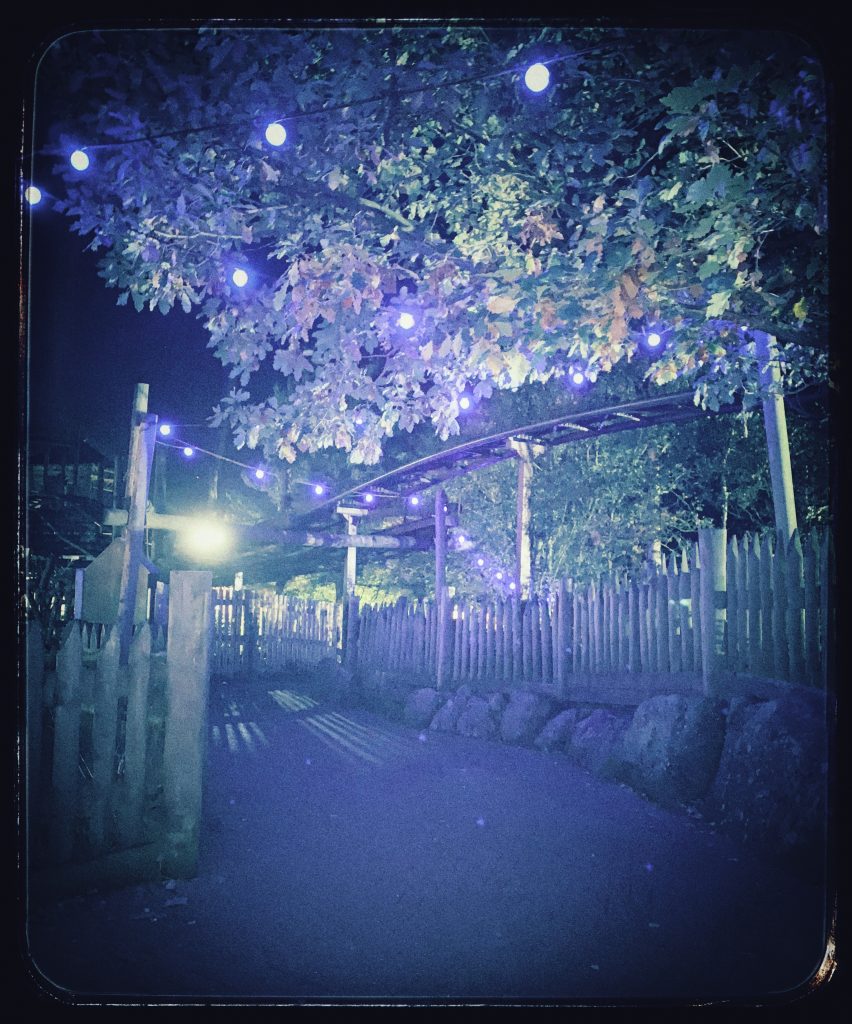
Speaking of lights, I love the vintage, globe lights. They look so pretty through trees and festooned in gardens.  They’re not strictly Halloween but I’m thinking that lighting the garden with these lights might mean that we can get more use from it during the autumn and winter months.

Caramel Cupcakes

I’ve been itching to make something with caramel for ages. I have a caramel flavouring but wanted to go the whole hog and make the caramel from scratch. In the past I have been put off making caramel because it just seemed a bit scary: making sure you get the temperature right; dusting the side of the pans; adding ingredients and ending up with a big mess. So I have attempted a really easy way and combined it with a basic sponge mix for the cupcake so that the flavour of the caramel doesn’t fight with anything. This recipe makes 12 cupcakes.

Ingredients

200g self raising gluten free flour
1 tablespoon xanthan gum
200g golden caster sugar
175g unsalted butter at room temperature
3 eggs beaten
1 tablespoon milk

For the caramel filling
200g white sugar
100mls double cream- you probably won’t use all of this.

For the topping
150g icing sugar
water
100g white sugar

Preheat the oven to 160C and line a cupcake tray with cases.

I prefer the all in one method for cupcakes, so add all the ingredients and mix until you get a smooth mix. Spread evenly between the cases and bake for approximately 20 minutes until golden brown.

Put the cakes aside to cool.

Cut a square of greaseproof paper and set aside. Take a pan and add 100g of white sugar onto a low heat. The sugar will go from sticky to forming small, pebbles to becoming liquid.

Once you have reached the liquid stage, take a spoon and dribble fine lines about 20 cm by 20cm of the caramel onto the greaseproof paper, keep doing this, criss-crossing to make a grid of caramel. Leave to cool for a good 20 minutes until it completely solidifies.

Place a clean pan with the 200g of white sugar on a low heat on a hob and like before, stir frequently until you get a liquid. When you have reached the liquid stage, turn off the heat and slowly add half a tablespoon of cream- the lactose in cream combines far better with the sugar than butter or even water. Stir gently; add more cream a tablespoon at a time until you reach a thick liquid mixture.

Pour a teaspoon of the caramel mixture onto each cupcake so that it soaks into the sponge.

Take the icing sugar and in a bowl add a spoonful of water before mixing well. Keep adding the water a little at a time until you get a thick, white icing. Top the cakes with the icing.

Break the solid caramel into small pieces, top each cake with a piece of the caramel.

Bedtime Cookies

The thing with kids is, you give something a novelty name and they want to try it. If I asked ‘would you like a low sugar, oaty biscuit’ for supper I can pretty much guarantee they’d turn me down, somehow calling this a bedtime cookie makes it OK. This cookie recipe uses as little sugar as possible, I’ve tried less than the 80g, but it just tasted a little bland, even when trying to balance it out with more sugar.

Ingredients
125g unsalted butter softened
80g golden caster sugar
2 tbsp honey
1 large egg
juice of ½ lemon
140g gluten free porridge oats
140g gluten free plain flour
1 tsp xanthan gum
1 tsp gluten free baking powder

Preheat the oven to 150C and line a tray with baking paper.

Cream together the butter and sugar until light and fluffy.

Add a third of the oats and stir well before adding the egg, lemon juice and honey and once again stirring well to combine all of the ingredients.

Add another third of the oats, stirring well before adding the final third.

Add the flour, xanthan gum and baking powder and combine well. You want a sticky mixture that holds its shape.

Make 12 golf sized balls and gently flatten down until it’s the depth of about a centimetre.

These will take about 15 minutes to bake. When the outside of the cookies is brown but the middles are soft, remove from the oven. Leave to cool and firm for about 15 minutes.

baked eggless doughnuts

You know those times when you go into a supermarket for one thing and then come out with something completely different? This is one such time. I went in for milk and came out with a diffuser selection and a mini doughnut maker. I should have added eggs to my random shopping, because when I got my new toy home I had to try and adapt a recipe because we had no eggs. I did however have chocolate chips so every cloud and all that.

This recipe substitutes eggs with oil. I’ve tested it a few times and each time the amount of oil is uses varies slightly. So with that in mind, the ingredients listed below use the maximum amount of oil i’ve used, it adds a bit at a time, which gives you a good gauge on whether you need to use the full amount.

60g unsalted butter
170g golden caster sugar
1 ½ teaspoons gluten free baking powder
1 ½ teaspoons xanthan gum
1 teaspoon ground cinnamon
1 teaspoon vanilla extract
150 g gluten free plain flour
8 fluid ozs milk
8 fluid ozs olive oil
4 oz chocolate chips

Preheat the mini doughnut maker

In a bowl cream together the butter and the caster sugar until it becomes light and fluffy.

Add the baking powder, xanthan gum, cinnamon, vanilla extract and a third of the flour and mix until well combined.

Add half of the milk and stir until well mixed, before adding another third of the flour and mix.

Add half of the oil and mix, add the remaining flour and mix well.

Stir in the remaining milk. You’re looking for a mix that is thick, shiny and holds it’s shape without being tough and this is where you may need to add the remaining oil to get that. Add a tablespoon at a time until you’re happy with the mix.

Finally stir in the chocolate chips.

Add enough of the mix to the doughnut maker so that it fills the base of the individual pan. Each batch will take approximately 3-6 minutes to cook, they’re ready when they look golden brown and remove easily from the pan. This recipe makes about 18 mini doughnuts.

Not a sprinkle in sight

Don’t get me wrong, you can’t beat a good dollop of sprinkles, but sometimes it’s nice to do something a little different. Hiding in my drawer of sugar craft bits and pieces, I stumbled across a bikini mould that I hadn’t used in ages. This, I thought, would be the perfect cake topper for the cupcakes for my mum’s birthday.

The knack of using these moulds is to make sure you get a decent covering of icing sugar or cornflour right into the nooks and crannies of the mould and making sure your sugarpaste hasn’t been handled too much other wise you risk getting part of it stuck in the mould. Once they were free of the mould I then left for about 20 minutes just to firm up before placing on the cupcakes.

I can’t remember where the bikini moulds came from, but here’s a cheeky selection


Happy Birthday mould TheVanillaValley £6.95 plus shipping
Lips mould home sale_sky on Ebay £2.42
Wonder Woman mould WeLOVE3dprinting on Etsy £4.50
Skulls ArtycoUK on Etsy £7.50 (Sugar Skull) & £17.95 (skull)
Gamer mould The Craft Company £19.06 plus shipping
Cherries Kawaiikitchen on Etsy £4.21 plus shipping
Shoes TheVanillaValley £8.35 plus shipping

Carrot Cake

Somehow carrot cake makes me feel less guilty, I reason that perhaps I’m getting one of my five a day?? Either way, this recipe is really simple and makes a lovely, light cake.

Ingredients
400ml vegetable oil
400g gluten free plain flour
2 teaspoons xanthan gum
2 teaspoons gluten free bicarbonate of soda
450g golden caster sugar
5 medium eggs beaten
2 teaspoons ground cinnamon
1 ½ tbsp. golden syrup
4 carrots grated

Preheat the oven to 160C and grease and line your tin, I used a square 20cm x 20cm.

Add the oil into a bowl and sift in the flour, xanthan gum and bicarb’ of soda, then add the remaining ingredients before stirring well. You should end up with quite a wet and thick mix.

Transfer to the tin and bake for about 40 mins or until a skewer inserted into the cake comes out clean.

You can top this cake with a buttercream or cream cheese topping, or I just mixed up some icing sugar and water to a thick-and-still-a-bit-runny consistency. If you want to freeze do so before adding any topping.

Rainbow Cake

What’s better than a sponge cake? A sponge cake with all the colours of the rainbow!! Well 5 colours anyway. This cake takes a basic sponge mix and pimps it right up. It’s perfect when you want to keep things simple but make something a little bit different. This cake was made using the Wilton Easy layer cake pan set and the Wilton food colouring pack.

Ingredients
200g self raising gluten free flour
1 tablespoon xanthan gum
200g golden caster sugar
175g unsalted butter at room temperature
3 eggs beaten
1 tablespoon milk
5 food colourings

To decorate
300g softened unsalted butter
600g icing sugar
4 tablespoons of milk
food colourings in the colours of your choice

Grease the cake tins and preheat the oven to 150C.

I prefer the all in one method for sponges so I add all the ingredients into a food processor and mix until well combined.

Divide your mix into 5 bowls, in each bowl add a couple of drops of the colour you want for that layer. Mix well until the mix is a uniform colour.

Put the mix into the tin and bake for about 15 minutes. Remove from the oven when the cake starts to come away from the sides.

Allow to cool.

In the meantime, to make your buttercream icing, add the butter to a food processor and slowly add the icing sugar, after you have added about half the icing sugar, add half the milk. Continue adding the icing sugar and the milk.

I wanted an ombre effect on the cake, so divide your buttercream in half. One half will be for the filling and top, the other for the sides.

When the cake has cooled, spread butter cream throughout the layers and on top.

Add a couple of drops of food colouring to the remaining butter cream and mix well. Spread half of this mixture all around the sides of the cake. Add a couple more drops of food colouring to the remaining buttercream and spread half of this 2 thirds of the way up the cake.

With the remaining butter cream, add a further 1 or 2 drops of food colouring, mix well and spread across the bottom third of the cake.

Not so traditional blondie recipe

Where traditionally a blondie has no vanilla and uses brown sugar, this recipe uses both and it also involves melting the white chocolate in the same way you would the milk or dark chocolate in a traditional brownie. And while I’m at it, instead of adding nuts, a frequent addition to a blondie, this uses linseed. Oh and to really throw caution to the wind, it’s gluten free.

Ingredients
150g white chocolate buttons
125g unsalted butter
150g golden caster sugar
3 tablespoons golden linseed
1 teaspoon vanilla extract
200g gluten free plain flour
1 tablespoon xanthan gum
2 medium eggs

Rectangular tin

Preheat the oven to 150C and grease and line your tin.

Melt the chocolate buttons and the butter in a bowl over a simmering pan of water. Just as the last piece of chocolate is about to melt, remove the bowl from the pan and stir until it has melted.

Add the linseed and vanilla and then stir in the flour and xanthan gum before finally adding the eggs, one at a time.

When the mix is well combined, pour into your lined tray and bake for about 35 minutes until that top starts to go golden and the edges just start to lift from the sides.

While the blondie is still warm, cut into squares.

All that glitters is gold

After all that snow that the beast from the east left us, how about something all glittery and sparkly? During my usual trawl through the cake supplies shop, I took the plunge and bought some sheets of gold leaf, something I’ve wanted to try for ages. And while I was there I picked up some edible gold paint and sprinkles, well it would be rude not to.

As it was my first foray into gold leaf I wanted to give myself something simple to get a good feel. I decided on a simple design on a plain iced white cake and topped with some silk flowers. It’s actually a lot simpler than I thought. You need a couple of brushes and some water; brush the water onto the area you want to cover, then place the gold leaf onto that area and smooth with the dry brush. I jabbed the gold leaf a little to give it some texture. I used some silk flowers that I had that had a little gold sparkle to top off.

While I was on a roll, I decided to paint some Haribo Star Mix in the edible gold paint, because why not? I opted for the ring and the love heart over the egg. The paint is ready to use, just brush on. It’s quite thick so you get a good coverage but the Haribo still needed a couple of coats. If you were painting straight onto icing one coat would be plenty.

And to complete the gold rush, sprinkles and stars scattered over cupcakes, probably the simplest way to bring a bit of bling into your cake making.

Thank You Cake

You can say thank you with flowers, or you can go that extra mile and bake something lovely. This little, sweat treat is big enough to show someone you care, but small and simple enough to make in no time at all. I made the flower shapes with a flower cutter, I’m not the neatest baker so this cutter was perfect and it came with three sizes so you can create any size of masterpiece.

I made this cake as an individual serving, having said that you could easily get two decent portions from this.

Ingredients
2 oz self raising flour
2 oz golden caster sugar

2oz unsalted butter, softened
1 medium egg
1 tbsp milk

11cm cake tin

For decorating
Butter icing
2oz unsalted butter
5oz icing sugar
1tbsp milk

250g ready to roll white icing
selection of ready to roll icing in colours for your flowers
flower cutters
Icing sugar for rolling
rolling pin

Preheat the oven to 150C and grease and line your tin.

Add all of the ingredients except the milk to a food processor and mix until well combined, if the mixture is a little tough add the milk.

Transfer to the baking tin and bake for about 20 minutes or until golden brown.

Allow the cake to cool.

To make the butter icing, mix the butter until soft then slowly add the icing sugar. Finally add the milk and mix until well combined.

Keep a small quantity of butter icing to one side to attach the flowers.

Spread the butter icing over the cake and chill in the fridge for about 20 minutes.

Roll out the white icing so it’s big enough to cover the cake and be trimmed.

Using the cutters press flowers in different sizes and colours.

Cover the cake trying to get as smooth as possible, trim off the excess. Attach the flowers with the set aside butter icing.